I’m a former sugar addict. So for me to host a gingerbread house party is like a recovering alcoholic hosting a wine tasting. But, after much urging from my daughter Paloma, I went ahead and threw a gingerbread house decorating party with about a dozen kids.
In this article, I’ll show you how to host one yourself—without going crazy or funneling too much sugar into your young ones.
Making Your Own Gingerbread House
I have to recommend against the kits that you need to assemble yourself. In my experience, they’re a mess. And they require a structural engineer to stabilize them. AND they take an hour or two to dry and set before you can begin decorating them. But if you have a smaller party (or just your family) and feel inspired, go for it!
Here’s a classic recipe for your gingerbread house. Or, you can try this gluten free recipe as an option. Or, I love this oat flour, gluten free graham cracker recipe, which would work well. You can use these to construct your walls, floor, and roof. You’ll need to roll out the dough, form it into big rectangle pieces, and bake. (Here’s a guide with dimensions for your house.)
To hold your house pieces together, you’ll want to whip up a batch of royal icing, which is a combination of egg whites, powdered sugar, and cream of tartar. (You can find a recipe here.)
The Best Gingerbread Kit
Because I was buying supplies for a dozen kids, I went with pre-made house kits.
- I recommend the pre-assembled kits versus the ones you have to glue together the pieces of the house yourself. Be sure to double check the box description, as it can be confusing!
- Buy them at a store like Michaels, Walmart, Target, etc. The reviews on Amazon are terrible, because they usually break during shipping.
My local Whole Foods had eight houses available, so I grabbed those and then bought a few extra at Michael’s.
The Best Gingerbread House Kit
We also decorated gingerbread men cookies, which was fun.
Gingerbread man
Decorating Logistics
Now for the fun part: decorating the houses!
Many gingerbread house kits come with special icing that hold or “glue” the candy decorations nicely. They usually also come with a piping tip, so you can make fun flourishes.
Since my Whole Foods houses didn’t come with frosting, I had to make my own. I normally would have made royal icing (see recipe above), but I would have had to purchase pounds and pounds of sugar to make enough. Since that wasn’t happening, I looked into store-bought options.
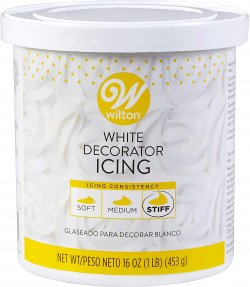
I ended up using Wilton decorating icing in “stiff” consistency, which worked well to hold the candy decorations.

You can plop this stuff into a reusable piping bag and use this popular tip—it gives you a beautiful and fancy look. If you are having a large party, aim to have one bag per 1-2 houses.
Traditional “royal icing” dries quickly and dries hard. This means you have to ice only a portion of the house (say one side of the roof) and decorate before moving onto another section.
I found the Wilton decorating icing listed above wasn’t prone to drying, so I didn’t have to be so diligent. In fact, next time, I think I would get a few helpers and ice all of the houses right before arrival. This way the kids only have to decorate versus wait for helpers to ice portions of the house.
I also didn’t put this Wilton icing into a piping bag, but instead smoothed it onto the house using a special knife. It still looked nice, but was much, much easier!
Now for the candy…
You can make your gingerbread houses as “healthy” or not healthy as you’d like. I went with about 50 percent healthier candy and 50 percent traditional candy, because I wanted to use iconic things like gumdrops.
Here are some natural candies that work well…